TASK:AP: Difference between revisions
(Created page with "__FORCETOC__ =About= This task is to add four additional wireless access points (for a total of 5) in the space and decommission 2 older access points. This is a pretty str...") |
|||
| Line 11: | Line 11: | ||
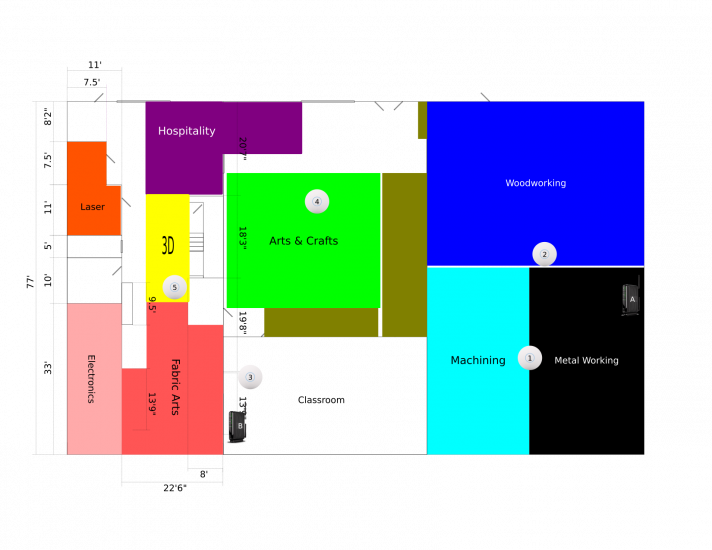
[[File:Km-ap-plan.png|x550px]] | [[File:Km-ap-plan.png|x550px]] | ||
1. Located on the ceiling between Machining and Metalworking. | 1. Located on the ceiling between Machining and Metalworking. Cabling run and AP connected. Switch side of cable needs terminated and hooked up. | ||
2. Located on the wall between wood and metal (on the wood side). The mounting bracket is already mounted on the wall. POE will need to be run here and an AP will need to be attached to the bracket. | 2. Located on the wall between wood and metal (on the wood side). The mounting bracket is already mounted on the wall. POE will need to be run here and an AP will need to be attached to the bracket. | ||
| Line 24: | Line 24: | ||
B. Located on top of the server cabinet in the Classroom. Also to be removed when new AP are activated. | B. Located on top of the server cabinet in the Classroom. Also to be removed when new AP are activated. | ||
=Access Points= | =Access Points= | ||
Revision as of 22:36, 26 May 2022
About
This task is to add four additional wireless access points (for a total of 5) in the space and decommission 2 older access points.
This is a pretty straight forward task if you have run network cabling before. Each AP will need an independent run leading back to the server cabinet therefore the most time consuming part will be neatly running the wire along the ceiling to the desired AP locations.
Locations
1. Located on the ceiling between Machining and Metalworking. Cabling run and AP connected. Switch side of cable needs terminated and hooked up.
2. Located on the wall between wood and metal (on the wood side). The mounting bracket is already mounted on the wall. POE will need to be run here and an AP will need to be attached to the bracket.
3. Located in the back of the classroom. Nothing is done yet.
4. Located on the ceiling of Arts & Crafts. Nothing is done yet.
5. Located high on a post in 3D zone. This one is already mounted and hooked up. Nothing further needs to be done.
A. This is the old AP in Bay 3. It will need to be removed once all the new AP are activated.
B. Located on top of the server cabinet in the Classroom. Also to be removed when new AP are activated.
Access Points
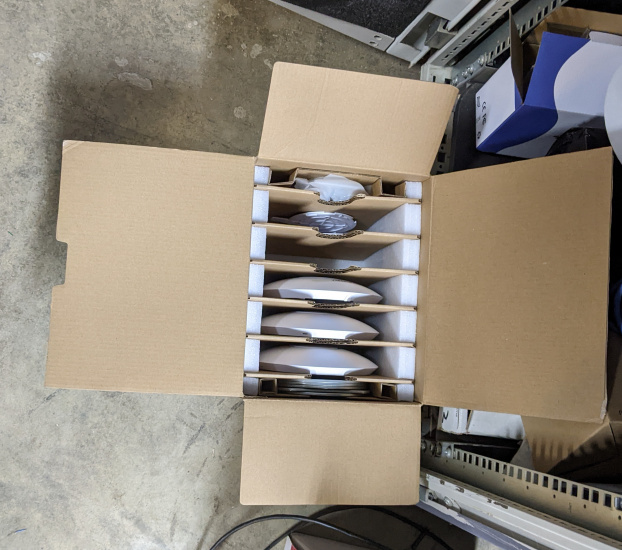
Thew new access points are in a box in front of the cabinet in the classroom. They are already configured. All they need is POE connected to the Local network switch.
Cable and Tools
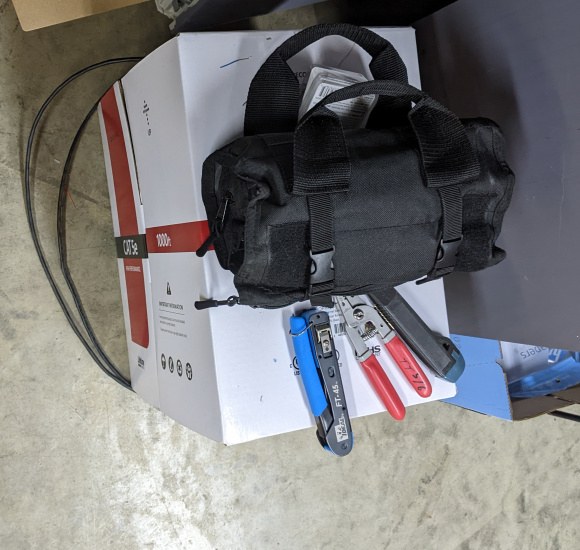
In front of the server cabinet in the classroom is a box of cat5e cable and ethernet termination tools, tester, and supplies.
Switches
IF YOU DO NOT FEEL COMFORTABLE HOOKING THIS UP PLEASE LEAVE IT FOR SOMEONE ELSE TO HOOK UP.
Incorrectly plugging this in can damage equipment. Since 99% of this task is running the cable, leaving this for someone else is not a big deal.
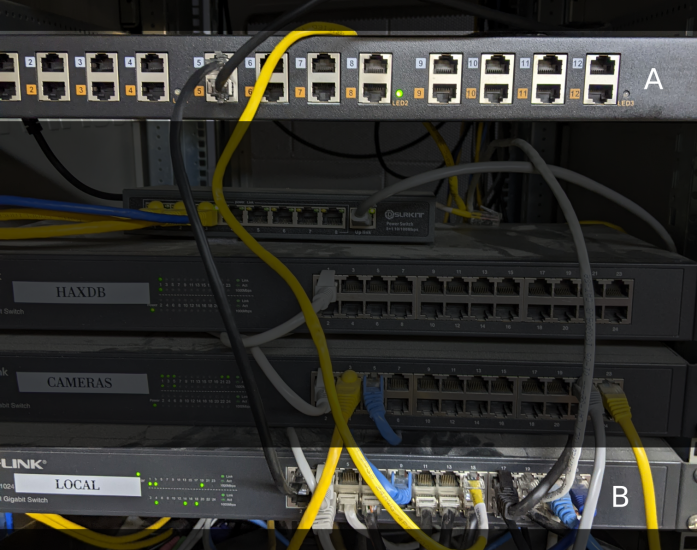
In the server cabinet in the classroom are a lot of things but of interest for this task are the switches highlighted and labeled A and B in this picture. The organization of these cables is shameful. Fixing that is outside the scope of this task and will be another task.
A. A POE injector switch. Source ethernet goes in on the top row and powered ethernet comes out of the bottom row.
B This is the source switch for our local network.


