Automated Smoker
So, I've been talking about this for a while now, but it's finally happening. I've been thinking about this project off and on for over a year now. I'd do a little bit of research for components, research other builds, and just ponder all sorts of variations on how to build the thing so it works like I want.
I've been playing around with a bit of arduino stuff lately, and I've discovered that to be super easy to throw stuff together and get it to work like one would hope. So I finished iterating my physical design, so I thought I would get this thing built, then get to work putting the electronics and controls in it.
Background on the science of cooking
In the smoking foods world, there are essentially three different types of preparation: smoking, barbecuing, and grilling. The definition of each is specific to what's being prepared, but the general idea is that smoking happens at temperatures below the point at which the fat in the food renders down. Smoky flavors bind to fats very well, so to get the smoky flavor to stick to something, there has to be plenty of fat in the meat, and not melting and running out on to the floor. For fishes and cheeses, this temperature can be less than 90°F. For beef and pork, it can reach up to almost 120°F. This process has some history in food preservation. It tends to dehydrate the food, which makes mold and other bacteria less likely to grow. It concentrates the salts and makes foods tastier by adding that wonderful smoky taste. The final product, however, is usually not one that can be eaten without further preparation.
Barbecuing is the slow cooking of meats in above the temperature of rendering fats and connective tissues, but below the temperature of denaturing the proteins, at which point they shed their water and the meat becomes a dry tasteless piece of shoe leather. Beef brisket and pork shoulder are two meats that are prime candidates for this treatment because they are full of connective tissue and fat. If you slow cook them for many hours, the fats rend down to keep the meat juicy, and the connective tissues break down into sugars and other carbohydrates, which makes the meat fall apart tender and slightly sweeter. Pulled pork and other such dishes are made this way. They traditionally have a smoky flavor because they were cooked over wood fires, but the smoke is just a flavor enhancement, not a requirement for dehydration or food preservation. The final product is fully cooked and ready to eat.
Grilling is something we all know about. It's cooking at very high temperatures to sear the meat and seal the goodness in, and allowing it to cook up to temp from there.
The Idea
So, grilling is usually a pretty short endeavor, and requires direct attention and action (flipping the meat, etc). However, both smoking and barbecuing require very little direct interaction and take a relatively long amount of time to finish. So the plan became to build a smokehouse that would be capable of both smoking and barbecuing with minimal interaction. The easiest way to accomplish this is to separate heat generation from smoke generation. Most commercial smokers use either gas or electric heat and some sort of smoke generator using sawdust or chips. They also tend to be made out of stainless steel, are heavily insulated, and cost a few thousand dollars, so that wasn't what I wanted to do. My idea was to still use wood as the heat source like traditional smoke houses, but be able to automate temperature regulation without having to baby sit the fire. The plan is to use a separate smoke generator as well, to make sure that I continue to provide sufficient smoke even when modulating my temperature.
In a traditional smoker, the chimney effect was used to create a draft from the fire to carry air (and smoke) through the smoker, but it required lots of tending. If the fire burns too hot, you can melt the fats in your smoked products and ruin them. If it gets too cold, the food can spoil. The traditional way to control this was to constantly add small amounts of wood to the fire.
The Design
My design ended up using two blower fans to move air about. One fan constantly recirculates the air inside the smoker because without the fire in the bottom to create a draft, it's hard to ensure that the smoke will fill the chamber effectively without the recirculation. It also has the added effect of basically making my smoker a convection oven. That should mean that when I'm barbecuing, I can do it at a lower temperature for shorter periods of time.
The second fan is used as an induced draft fan for exhaust. The idea is that I'll seal the smoker up air tight, but create one exit, where i'll put the fan, and one inlet, that leads to the stove pipe of an external fire box (a wood stove). If the box is sufficiently sealed, all the air being exhausted should cause the smoker to draw hot air from the stack of the firebox. If I modulate my exhaust fan, then I can very easily control the temperature inside the smoker, and all I'll need to do is just keep the fire burning well in the stove without having to very closely tend it to keep it at just the right fire level. When I'm not drawing air into the smoker, it will just exhaust out the chimney of the stove without overheating my food.
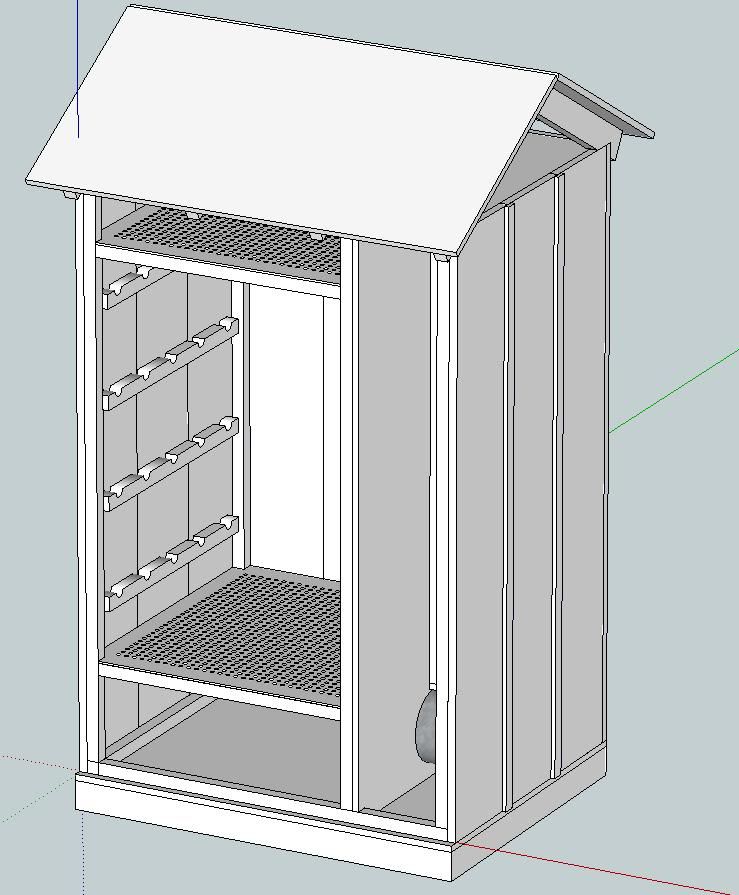
I ended up designing this thing in sketchup, which is a surprisingly good tool for designing stuff for woodworking. See some screenshots below.
The full design:
<a href="http://s294.photobucket.com/albums/mm93/lazarus1861/Automated%20Smoker/?action=view¤t=Full.jpg" target="_blank"><img src="http://i294.photobucket.com/albums/mm93/lazarus1861/Automated%20Smoker/Full.jpg" border="0" alt="Full"></a>
Here is the same view without the front:
<a href="http://s294.photobucket.com/albums/mm93/lazarus1861/Automated%20Smoker/?action=view¤t=NoFront.jpg" target="_blank"><img src="http://i294.photobucket.com/albums/mm93/lazarus1861/Automated%20Smoker/NoFront.jpg" border="0" alt="No Front"></a>
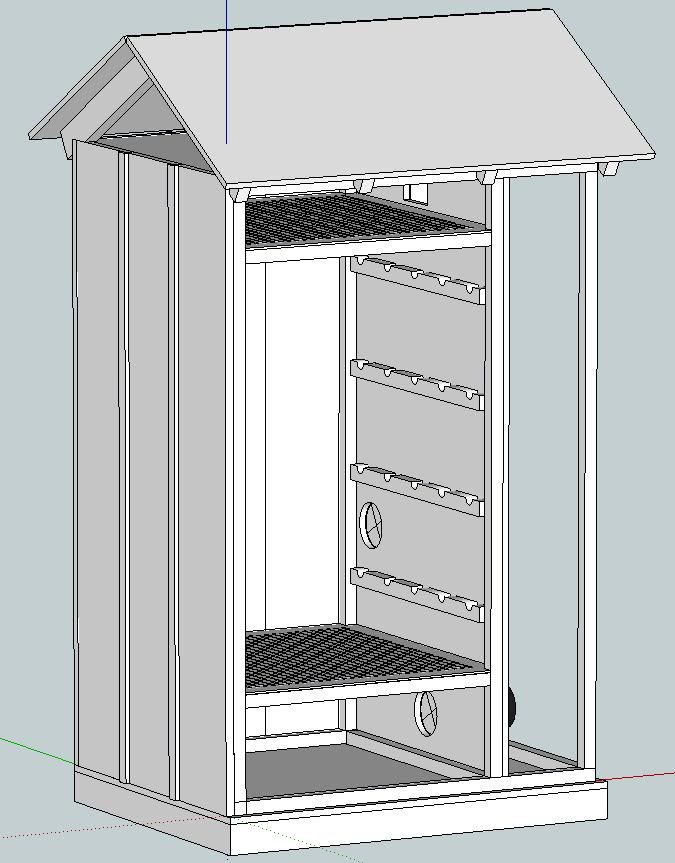
Here is smoker with the right wall missing. I've sketched in the blowers to size. No electronics or fire box equipment is currently shown.
<a href="http://s294.photobucket.com/albums/mm93/lazarus1861/Automated%20Smoker/?action=view¤t=noright1.jpg" target="_blank"><img src="http://i294.photobucket.com/albums/mm93/lazarus1861/Automated%20Smoker/noright1.jpg" border="0" alt="No Right 1"></a>
And here's another view with the same pieces missing:
<a href="http://s294.photobucket.com/albums/mm93/lazarus1861/Automated%20Smoker/?action=view¤t=noright2.jpg" target="_blank"><img src="http://i294.photobucket.com/albums/mm93/lazarus1861/Automated%20Smoker/noright2.jpg" border="0" alt="No Right 2"></a>
Building the Box
To get to the cool part of making this crazy automated smoker, I first need to get myself a box that I can start playing with. To that end, I've started the wood working part of my project. Here are some pictures from construction this past weekend.
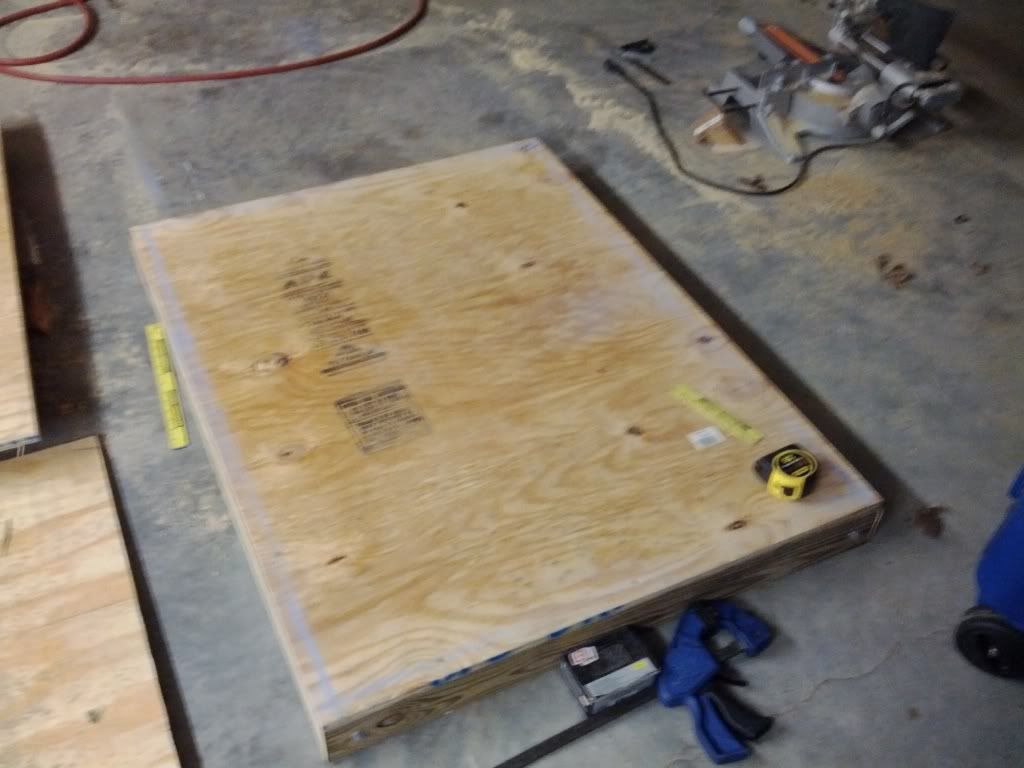
The plan is to make a block foundation and use ground anchors to prevent it from being pushed over by operator error/wind. So we got started by making a base: <a href="http://s294.photobucket.com/albums/mm93/lazarus1861/Automated%20Smoker/?action=view¤t=IMG_20120203_195910.jpg" target="_blank"><img src="http://i294.photobucket.com/albums/mm93/lazarus1861/Automated%20Smoker/IMG_20120203_195910.jpg" border="0" alt="Assembled Base"></a>
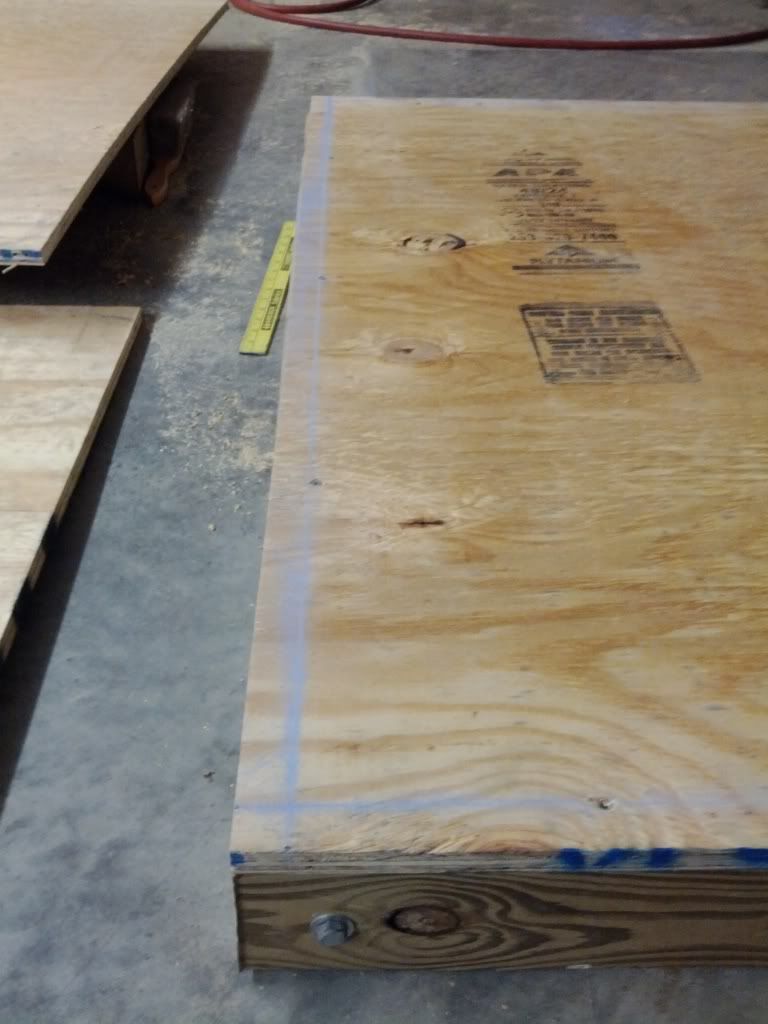
A friend was nice enough to donate a dozen 1"x12"x12' boards to use for the skin of this thing. I'm going to make a board and batten exterior for this thing, but I need a frame to mount it all to. So we marked out the frame on the base:
<a href="http://s294.photobucket.com/albums/mm93/lazarus1861/Automated%20Smoker/?action=view¤t=IMG_20120203_195922.jpg" target="_blank"><img src="http://i294.photobucket.com/albums/mm93/lazarus1861/Automated%20Smoker/IMG_20120203_195922.jpg" border="0" alt="Marked Base 1"></a>
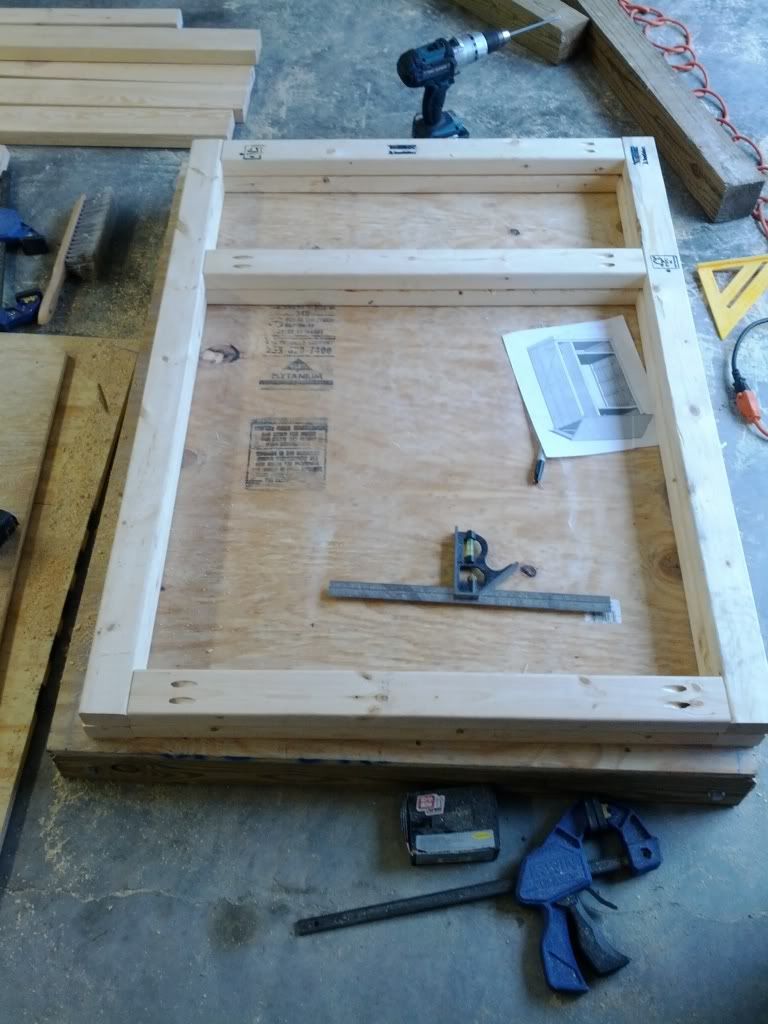
Then we made two identical frames, one each for the top and bottom: <a href="http://s294.photobucket.com/albums/mm93/lazarus1861/Automated%20Smoker/?action=view¤t=IMG_20120204_114348.jpg" target="_blank"><img src="http://i294.photobucket.com/albums/mm93/lazarus1861/Automated%20Smoker/IMG_20120204_114348.jpg" border="0" alt="Framing 1"></a>
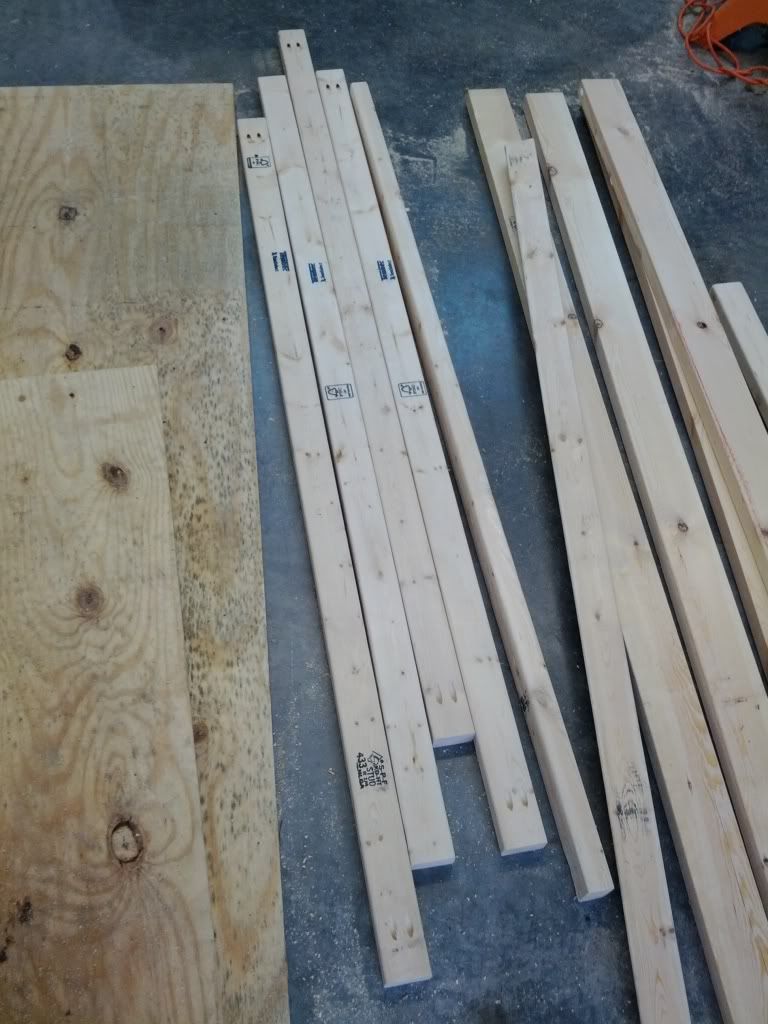
Then we cut and drilled the uprights: <a href="http://s294.photobucket.com/albums/mm93/lazarus1861/Automated%20Smoker/?action=view¤t=IMG_20120204_114356.jpg" target="_blank"><img src="http://i294.photobucket.com/albums/mm93/lazarus1861/Automated%20Smoker/IMG_20120204_114356.jpg" border="0" alt="Framing Uprights"></a>
Then we installed the divider wall and assembled the frame:
<a href="http://s294.photobucket.com/albums/mm93/lazarus1861/Automated%20Smoker/?action=view¤t=IMG_20120204_162429.jpg" target="_blank"><img src="http://i294.photobucket.com/albums/mm93/lazarus1861/Automated%20Smoker/IMG_20120204_162429.jpg" border="0" alt="Framed with Divider 1"></a>
The small section is to house the fans and all the electronics. The larger section is the smoker itself. The cross beams in the larger section actually show where baffle plates are going to be installed. The baffles are necessary to ensure that I get even distribution of the air in the smoker, so things get evenly smoked/cooked, even if it's loaded up.
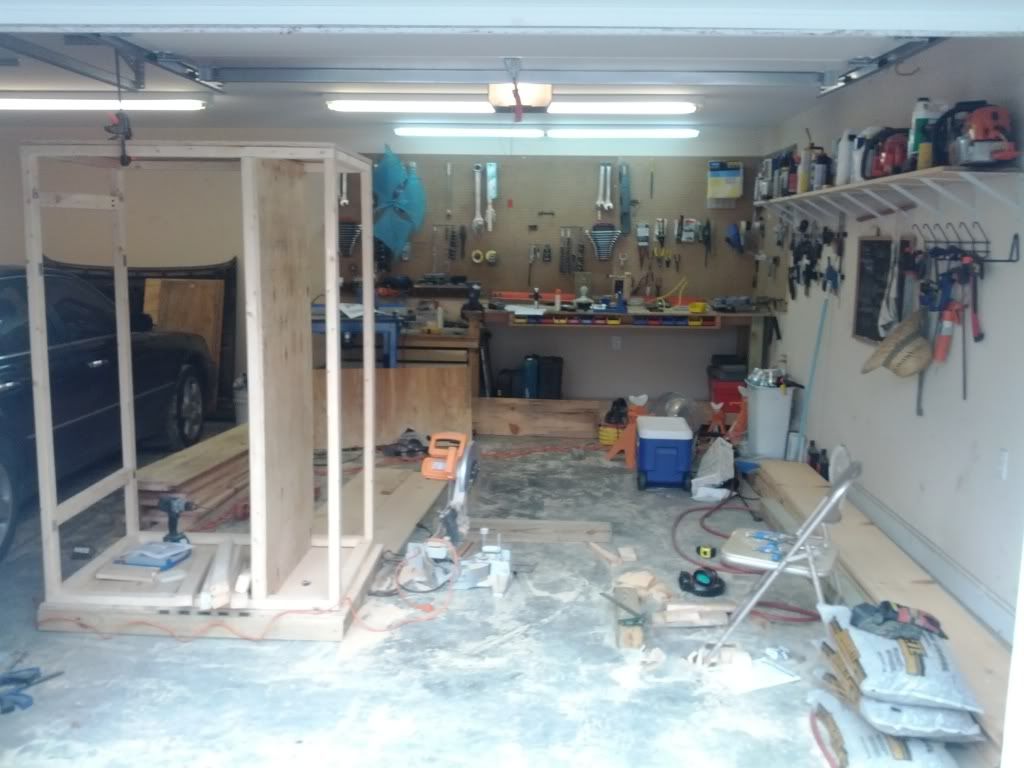
Here's what my garage looked like after one day of working: <a href="http://s294.photobucket.com/albums/mm93/lazarus1861/Automated%20Smoker/?action=view¤t=IMG_20120205_094553.jpg" target="_blank"><img src="http://i294.photobucket.com/albums/mm93/lazarus1861/Automated%20Smoker/IMG_20120205_094553.jpg" border="0" alt="First Day's Work"></a>
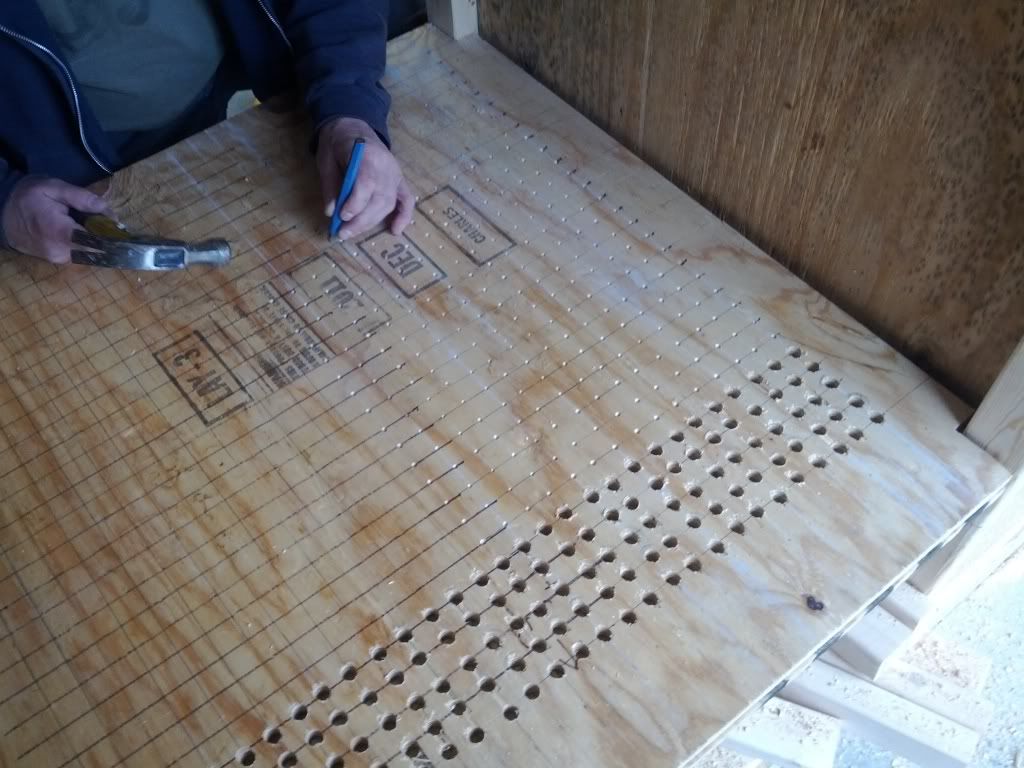
Sunday was a pretty short day. I had to help my neighbor with a few of his projects, then go to a superbowl party. We did manage to finish up cutting the pieces for the skin of this thing, and get started on the baffle plates. It kinda sucks making them, and I'm not exactly 100% certain that they are going to work right, but we'll see how it goes.
Baffle Plates: <a href="http://s294.photobucket.com/albums/mm93/lazarus1861/Automated%20Smoker/?action=view¤t=IMG_20120205_143739.jpg" target="_blank"><img src="http://i294.photobucket.com/albums/mm93/lazarus1861/Automated%20Smoker/IMG_20120205_143739.jpg" border="0" alt="Baffle 2"></a>
Going Forward
I've got all the framing cut, and most of it in place. All the pieces for the board skin is cut, but some of it needs some finish work. I haven't cut any of the battens yet. There will be lots of finish work around the door. I'm going to take most of these pieces and do assembly outside in place. It would be much to heavy to move it into position if it were fully assembled before being put outside.
The plan is to make phase one getting the box set up with the ability to do cold smoking, then add the firebox and associated controls in a phase two later this spring once barbecue weather rolls around. Phase two is definitely going to be the part that I'd love to get a team together and help me design all these electronics to make this thing awesome.